Working LilacSat-1 (LO-90)
Overview
The following instructions detail the steps for working the amateur radio repeater on the LilacSat-1 (LO-90) satellite using a FUNcube Dongle Pro+ Software Defined Radio (SDR).
Computer Setup
- Read the LilacSat-1 Overview first: LilacSat-1 Radio Info
- Download the LiveCD, burn, and boot. For instructions on this, go here: Chertsey Radio Club LilacSat-1 Tutorial
- Additional Requirements: The computer will need an SDR and an internet connection to receive LilacSat-1.
Note: for the purposes of the instructions that follow on this page, I am using a FUNcube Dongle Pro Plus as the SDR. For other SDRs like RTL-SDR, use the equivalent GNU Radio Companion files.
Testing Audio Decode
- Learn about the downlink audio codec, and then test the audio decode by following these instructions by Daniel Estévez (EA4GPZ): LilacSat-1 Codec 2 downlink/
- You can download the LilacSat-1 Downlink IQ Record file for testing from this page: https://github.com/bg2bhc/gr-lilacsat/blob/master/README.md
- To perform the test, you will use the demod_lilacsat-1.grc and replay_lilacsat1_rx.grc flows, located in the LilacSat-1 folder on the desktop.
- When the test is successful, it should sound like the audio clip included on Daniel Estévez’s page linked above.
Tweaking GNU Radio Companion Flows
Note: credit for the following modifications goes to Scott Chapman, K4KDR.
- Open the frontend_lilacsat1_rx_fcdpp.grc flow, and modify properties on the QT GUI Entry block to change the IF Gain value to 15, as shown in the screenshot below.
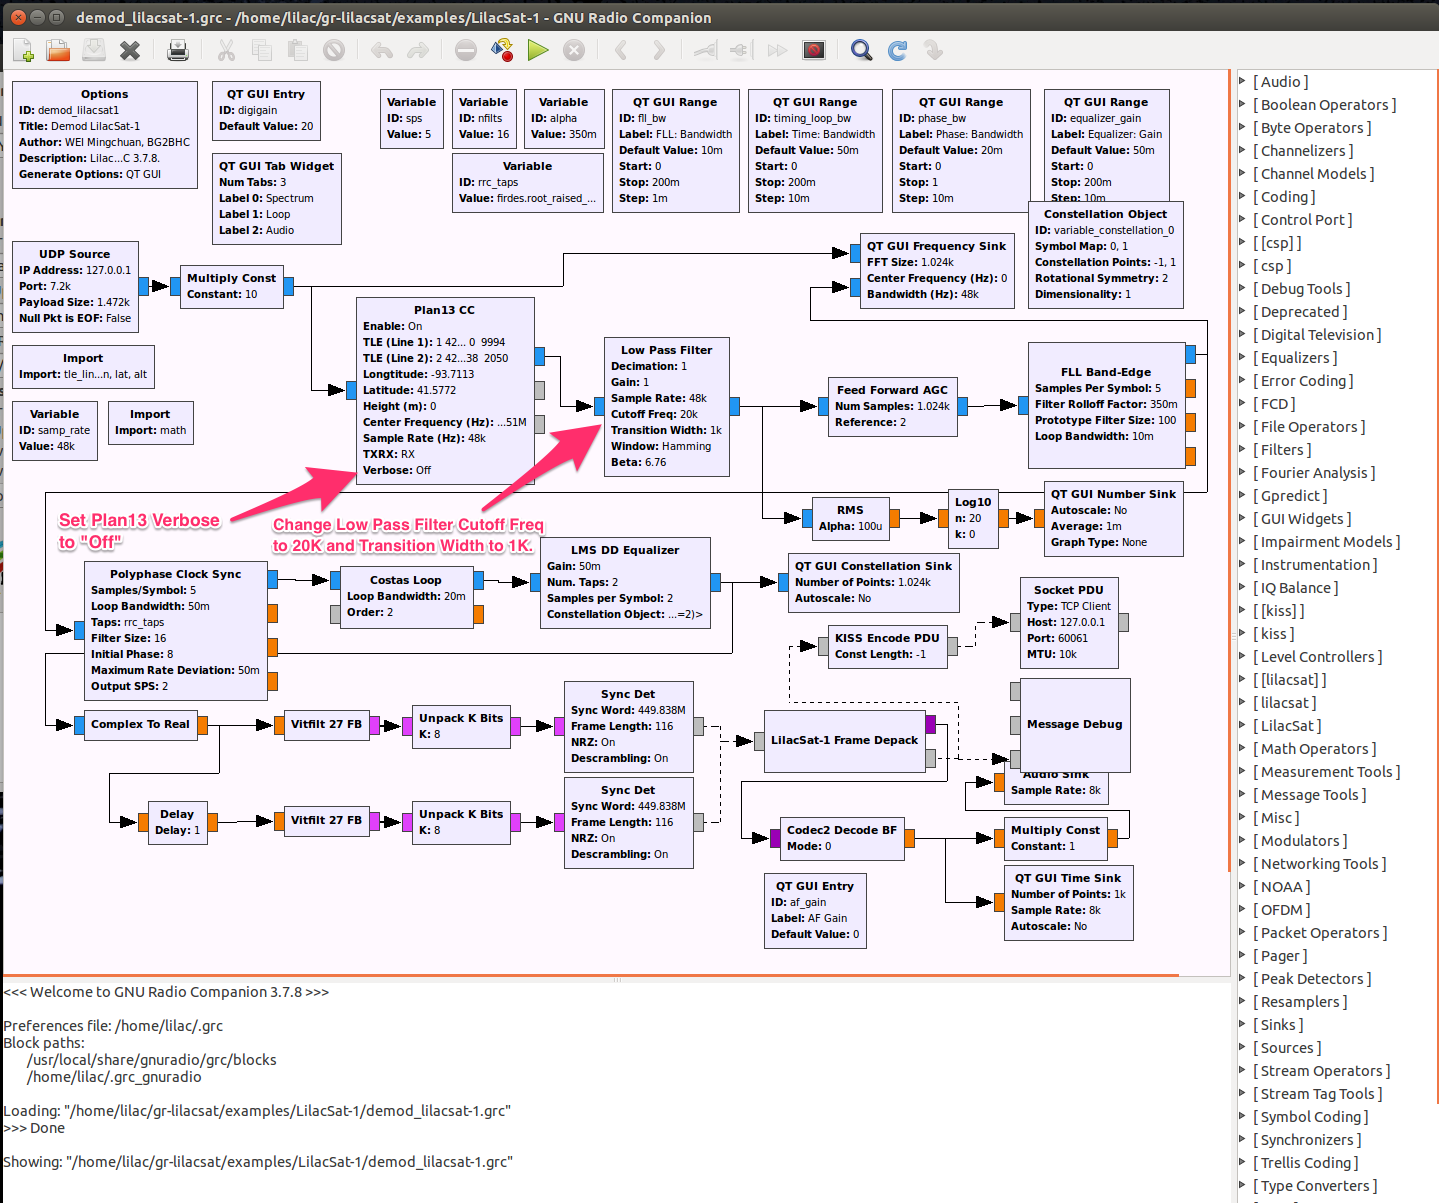
- Open the demod_lilacsat-1.grc flow, and modify the following properties, as shown in the screenshot below:
- On the Plan13 CC block, change the value of Verbose to “Off”.
- On the Low Pass Filter block, change the value of Cutoff Freq to “20e3”.
- On the Low Pass Filter block, change the value of Transition Width to “1e3”.

Figure 1: frontend_lilacsat1_rx_fcdpp.grc

Figure 2: demod_lilacsat-1.grc
Download a comprehensive flow that supports image download and decoding: demod_lilacsat-1-k4kdr.grc (Note: Requires gr-satellites not included on the LiveCD.)
SDR Receiver, Transmitter, and Antenna Setup
When working LilacSat-1, I use an Arrow satellite antenna for both the uplink and downlink. I protect my SDR from interference/damage by using the Arrow 10w duplexer. Here’s a block diagram of my setup:
UHF Driven Element → duplexer → SDR
VHF Driven Element → HT
You can read more of Patrick’s (WD9EWK) comments on a similar setup in this forum discussion: https://forums.qrz.com/index.php?threads/sdrplay-as-satellite-downlink-receiver.490793/
Working the Sat
Note: you can essentially follow the instructions in the tutorials here. I have listed some key steps below.
- Make sure you have an active internet connection.
- Make sure your SDR is plugged-in.
- Make sure your computer audio volume is turned up.
- Setup the LilacSat-1 Proxy by double-clicking the “01-Setup LilacSat-1 proxy” script, located in the LilacSat-1 folder. The password is “lilac”.
- Run the LilacSat-1 Downlink Proxy by double-clicking the “02-LilacSat-1 proxy” script.
- Enter your callsign (nick name) and location information (latitude, longitude, and altitude).
- Click the “Save Settings” button.
- Click the “Update Orbit” button and wait for the “Orbit Data Successfully Updated” message in the message console.
- Click the “Start Proxy” button, which should change its label to “Stop Proxy” when running.
- Run the frontend_lilacsat1_rx_fcdpp.grc flow, clicking the green triangle “Play” button. This requires the Proxy to be running, as the proxy feeds Doppler correction data to this flow.
- You should see the SDR waterfall now.
- Run the demod_lilacsat-1.grc flow, clicking the green triangle “Play” button.
- You should see the Demod Signal view now, just like you saw when testing the recording above.
- At this point, you can work LilacSat-1 like you would any other Amateur Radio Satellite, transmitting with your transmitter (HT) and receiving with your SDR and computer.
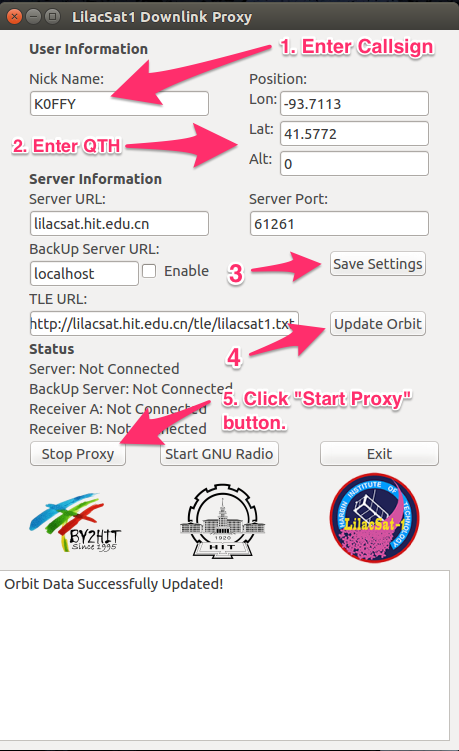
Figure 3: LilacSat-1 Proxy
Good luck!
Screen and Audio Recording
Note: If you want to record the screen and audio of your session, follow these instructions:
- Install GTK-recordmydesktop and PulseAudio Volume Control by running the following command from a terminal. The root password is “lilac”.
sudo apt-get install gtk-recordmydesktop pavucontrol - Open the Pulse Audio Volume Control dialog: Applications > Sound & Video > PulseAudio Volume Control
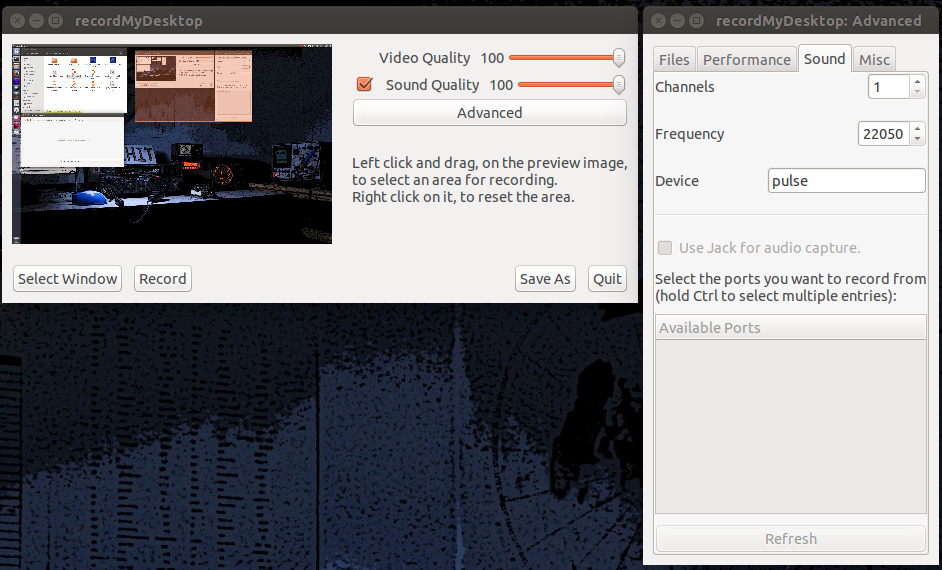
- Open gtk-recordmydesktop.
- In gtk-recordmydesktop advanced preferences, “Sound” tab, set “Device” to
pulse - In gtk-recordmydesktop start a recording.
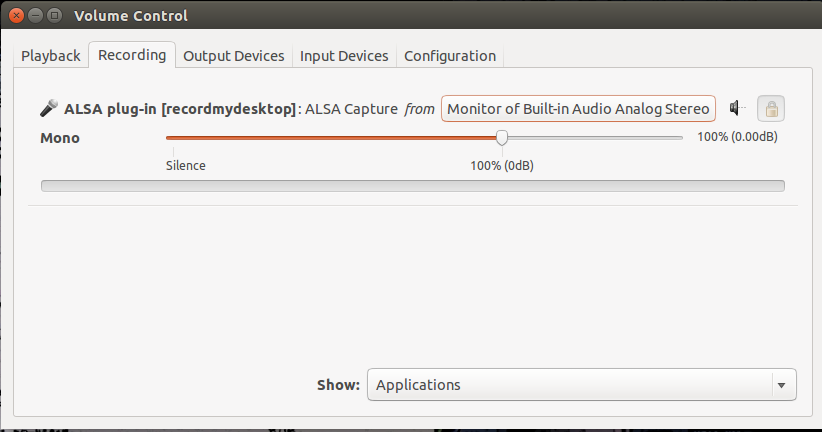
- In Volume Control go to the Recording tab and change the recordmydesktop entry to “Monitor of Built-in Analog Audio Stereo”.
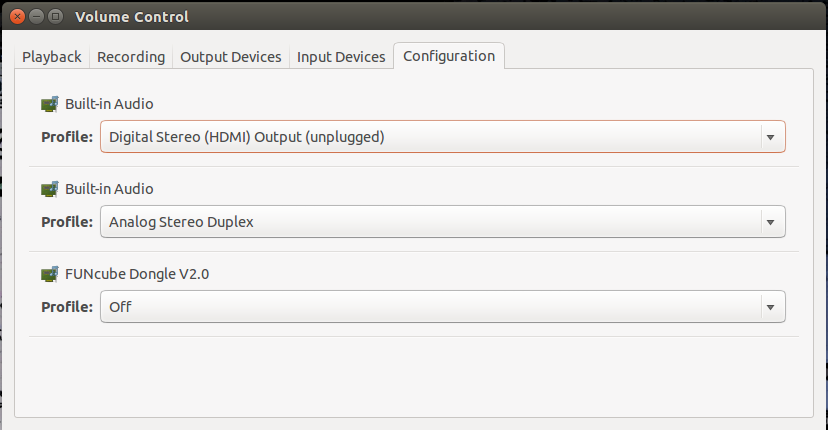
- IMPORTANT: In Volume Control go to the Configuration tab and change the FUNcube Dongle profile to “Off”.
3 thoughts on “Working LilacSat-1”